10/29/2011

Ozarks Leaves

Add caption
I once ruined someone's dream. Not intentionally, but when the leaves start changing in our woods, I am reminded of the incident. I'd traveled to the jungles of West Papua, New Guinea to go trekking with a friend. We'd flown into the Belim Valley, a remote town with an airport so tiny all of the daily passengers could fit into one twin-engine Cessna.

The only accomomdations in the tiny town was a little guest house run by Ebu Hinkie, an elderly Javanese woman. The rooms were rustic, spartan, with a bathroom that consisted of a hole in the floor, and a concrete tank filled with water. To bathe, you dipped a bucket into the tank and poured it over yourself like a shower.

Ebu Hinkie (Ebu, or maybe it was Eboo, is a respectful term like Mrs. or mother) was large, always wearing big caftan-type dresses when she served our morning breakfast of fruit, eggs and toast. The dining room was a little room with a table and chairs, a big tea pot much like a restaurant coffee pot, always filled with boiling tea, and a little window. The wall behind the table and chairs, about 8 x 8 ft. held a mural of colored leaves in Vermont in October. It was a surprise to see a mural of Vermont, deep in the jungle of New Guinea, and one morning I inquired about it. "With this beautiful landscape all around you, why did you choose a photograph of trees in the United States?" I asked. Ebu Hinkie understood only so much English, and spoke less, but she replied, "It's my dream to some day, maybe see the place where trees are always like this."

She understood when I explained the leaves in Vermont are green, they only change to orange, yellow and red for about 3 weeks once a year. Ebu Hinkie's face fell. "Oh," she said and turned and walked away. Why couldn't I have kept quiet. I regretted crushing a simple dream but hopefully she had others that weren't so fragile. Here are the leaves in the yard this week. I wish Ebu Hinkie could see and enjoy them.
Sumac leaves. It's correctly pronounced shoo-mack.
Virginia creeper on persimmon bark.
Persimmons are ripe on our trees this week.
Hickory leaves.
Spicebush (Lindera benzoin) an herb, has yellow leaves and red berries now.
View of our Herb Shop with the hillside in the background.
I think the woods in the Ozarks looks every bit as good as Vermont in the fall of the year.


Add caption
Happy Halloween. Don't eat too much candy!

10/23/2011

Fish House Green Tomato Pickles


This week I've been picking as much of the garden produce as I can before a killing frost comes. We've had 2 light frosts but even the basil plants haven't been hurt much. Yet. After a summer of drought and heat and low tomato and pepper production, those plants have gone into high gear, trying to catch up on production.

Adam, who I have written about here many times, left us with a fabulous fall garden. Too bad he didn't get to enjoy such lushness during the summer when he was farming the garden and selling at local farmers markets. (Adam left in mid September to work on a farm in Maryland for the winter; that farm sells at the DuPont Circle farmers market the year around).

Ten pints of fish house green tomato pickles.

I've spent the day today, putting up some of the excess produce. With all the green tomatoes, I wanted to use the smaller ones for fish house green tomato pickles. They're a favorite in the catfish restaurants in the South and it's a great way to use up some of the tomatoes. Josh plans on making green tomato mincemeat, too, for pies this winter.

Tomatoes ripening in the window.

The larger green tomatoes will simply stay on the kitchen windowsill where they will slowly ripen over the next couple of months. (I've used the wrap-in-newspaper method, which is a hassle, also the put-in-the-basement method, also a hassle to check every couple of days; on the windowsill, where I see the tomatoes every day, is the easiest and simplest and works just fine. Some years we have the last of our summer's ripe tomatoes on Christmas Day).

You can use green tomatoes in any recipe that calls for ripe tomatoes, too.

Here's the recipe in case you want to use up your green tomatoes:

Catfish-House Green Tomato Pickles

2 quarts quartered green tomatoes
2 cups chopped onion
1/3 cup chopped hot peppers
1/3 cup chopped sweet red bell peppers
2 cups sugar
3 Tablespoons salt
3 cups apple cider vinegar
1 teaspoon celery seed
1/4 teaspoon yellow mustard seed

Combine ingredients in a large cooking pan and bring to a slow boil. Let simmer for about 5 minutes. Ladle into hot, sterile jars, wipe lip edge of jars, screw on hot, new jar rings and flats and lightly tighten. Place into a boiling water bath, with at least 1/2 inch of water above the jar lids. Bring to a boil and keep slowly boiling for 15 minutes (for pints). Remove and cool on a towel. Don't tinker with the lids, they will seal in a few minutes. Let cool overnight then label and store in the pantry. These are best after the flavors have matured, about 2 weeks or more.

Hot sauce with a kick, and green tomato salsa are from a single recipe. 

I also made a batch each of green tomato salsa and one of green tomato hot sauce. If you'd like the recipe for those, visit my recipes blog. Both are a combination of varieties of hot peppers and it's a tasty hot sauce with a real kick.

10/16/2011

Freezing Pesto

Rows of sweet basil in our garden.

With predictions of frost in our area in the next week or so, friends have been thinking about ways to preserve basil. It doesn't have to actually frost, for basil to drop its leaves, just a very chilly night and the leaves start falling. I know my friends have been thinking, "pesto" because I've gotten 2 phone calls and an email, asking for a good pesto recipe. Here's my favorite and it can be frozen and kept for the winter months. Just fill ice cube trays with the fresh pesto, freeze, then pop out the pesto cubes into plastic bags and keep frozen until ready to use. And there's a simple trick to keeping frozen pesto tasting fresh (below).

Freezer Pesto

4 cups basil leaves, loosely packed
1 cup extra virgin olive oil
4 tablespoons almonds or walnuts (you could use pine nuts, they're more expensive, but I like almonds better)
6 cloves garlic, peeled
1 tablespoon fresh lemon juice
1/2 teaspoon salt

Put everything into the food processor and blend ingredients until smooth. Scrape the edges to make sure everything has been processed.
Pour the mixture into ice cube trays, filling each section. Freeze for 24 hours, then pop out the cubes into Zip-Lock bags and keep frozen.

Now the trick. When you are ready to use pesto, combine it with half Romano, half Parmesan cheese, freshly grated if possible. Since those cheeses don't freeze well, the flavor of your pesto will stay much fresher if you don't put the cheese in the pesto before freezing.

Rose and Basil Pesto
Roses and basil taste great together!

2 cups fresh basil
1 cup fragrant *rose petals
3 cloves garlic
1/2 cup pine nuts (I prefer walnuts)
3/4 cup extra virgin olive oil
1 teaspoon food grade rose water
1 teaspoon freshly squeezed lemon juice (don't substitute bottled juice)
1 cup Parmesan cheese, freshly grated
1/4 cup Romano cheese, freshly grated
Salt, optional

Peel and coarsely chop garlic, then add rose petals, basil, nuts and olive oil in food processor. Pulse blend until everything is well pulverized.
Add remaining ingredients and mix well. This can be stored for up to 4 days in the refrigerator.

*If you aren't sure what roses you can use, visit my YouTube video for tips on using roses in food.
You'll find more of my videos at http://youtube/longcreekherbs/ as well.


You might also enjoy my book, How to Eat a Rose, available from my website.


Another suggestion about pesto. Collect the leaves from plants that aren't blooming, the flavor will be better. Lemon basil is tasty mixed with sweet basil or any of the varieties. Thai basil is the least interesting basil for pesto, but even that works if you've kept the flowers clipped off.
Sweet basil is one of the best flavored basils for pesto. Clip off and discard the flower stalks.

Lemon basil gives a fresh flavor to pesto, so use it in combination with other basils if you have it.

10/09/2011

Rosalind Creasy, The Edible Landscape

I'm excited to share with you a garden I was privileged to visit a couple of weeks ago. Rosalind Creasy has been gardening and writing about gardening for decades. Back when no one had heard about local foods and heirloom vegetables, much less edible landscaping, Ros was plowing her garden and planting the seeds that are now part of a nationwide movement. Her first book, The Complete Book of Edible Landscaping, was published by the Sierra Club in 1982. To get an idea of what she started with in the late 1970s, here's a view of her front yard:
Just an ordinary house on a small lot. The book, and the garden, had not yet been created.
Roalind Creasy is a landscape architect with a great eye for design, so it is no wonder the simple lot went from that, to what you see below. Instead of filling the newly cleared spaces with more green bushy things (the kind of plants I claim don't pay their rent, meaning, don't justify the space they take up in the landscape because they give nothing back) she planted edible plants everywhere. Here's almost the same view just 2 weeks ago:

Rosalind Creasy meets ust curbside in her edible landscape paradise.
Here (above) is that pesky dividing strip between houses, neighbors driveway on the left, Ros' driveway on the right. What's there besides the little hedge that acts as a curb? A few flowers, but if you look close, there are 3 very large eggplants and a planter filled with sweet peppers of several varieties. Just think, most people make this spot lawn that has to be mowed.
Still curbside, the bed is filled with herbs, vegetables and flowers.
 
I took 2 steps to the right after taking the curbside photo, still at Ros' driveway. Remember that photo in the beginning of the blank looking front yard? The street shows in the lower right corner, the driveway in the lower left of the photo, and everything else, between, is edibles. Great, arching rosemaries, potted figs, tomatoes, oregano, nasturtiums. Keep in mind, I'm still in the street, I haven't even stepped into the garden yet!
Standing at the front door, looking toward the street.

If you could look to the left, near the blue-green lattice fence in the left of the photo, you would discover the chicken pens. School children make a bee-line through the front of the garden almost every day to check on and see the chickens.
One of two chicken pens in the back of the photo. This is still curbside, too.
We're still in Ros' front yard. Several kinds of peppers and squash are in this bed, plus some herbs.
I didn't count how many raised beds and planters there were in the front garden, but many. Ros has blackberries, tomatoes, squash, eggplant, herbs, roses (remember my How to Eat a Rose book? Roses are edibles, too) and so many more vegetables and fruit I don't even remember them all. You could feed a family from the front garden and that doesn't even begin to describe the back garden!

Rosalind Creasy's first book, The Complete Book of Edible Landscaping can still be found on Amazon. Her second book, Edible Landscaping, newly released is also available on Amazon as well as through your local bookstore. It includes the basics for how turn your front (and back) yard into something other than grass and bushes. Learn about growing vegetables and herbs in containers, learn about organic pest controls, composting and a whole lot more. This is a large, hefty book, and it's overflowing with information from someone who knows gardening.

When I asked Ros if I could see her compost area, it didn't surprise me one bit to find a wonderful, working, well tended compost system, landscaped, of course! The chicken litter, garden debris, kitchen vegetable scraps and other organic compostables, all go into the compost and get recycled as new, rich soil into the garden beds.


Garden waste in, organic soil out and no fertilizer required to grow a garden.
And one more growing area, in the photo below, still in the front garden between the street and the house. The chicken pens are in the upper right of the photo, near the street.
Click to enlarge.

10/03/2011

Follow the blog

Come on, you are welcome to Follow this blog; even Paul Bunyan (or is that Harley Davidson) does!

Two or three times a week I receive emails from people who say they'd really like to follow my blog but can't figure out how. It's really quite simple and there are several options. I can see by the Visitor Counter on this page that lots of people stop by every day or two, but aren't followers. I like knowing who's reading my posts, like to know that it's not just ghosts but real people. So here are the Follow This Blog basics.
In the upper left corner, you'll see one of the several Follow buttons.
At the top of the blog page on your computer, you'll see the words, "Follow," Share," "Report Abuse," and "Next Blog." Click on the "Follow" button. It will open the pop-up window, below:
The pop-up window gives you options. You can follow publicly, meaning your name or a nickname which you choose, or, you can follow anonymously. If you look through the list of people who already follow my blog, you'll see some folks who choose to remain anonymous. Either way is fine. If you have a blog or website, you might want to follow publicly, because more people can find you that way.
Another way (there are actually 4, count them FOUR, different ways to choose to follow this blog) shows up in the next photo:
Simply click on the Join this site button. You'll get the same pop-up bottom as the other options.
By clicking on the Join this site button, you'll need a Google account, which takes about 2 minutes to start. Or you can follow anonymously, same as the above options.

Or, you can click on the "Posts" button under the "Subscribe to this blog" on the right side of my blog:
You can choose to receive an email when I post a new story, or with the options in 1, 2 and 3, you can put a little blurb on your Yahoo or Google page that keeps updated every time I post something and you simply click on that little button on your Yahoo or Google page to read the blog post.

So many options, all there to make it easy to follow the blog. The more people who follow my blog(s) the more my blogs are taken seriously by people curious about my books and website. You can follow with a photo of yourself, or if you're a shy person, you can let the blog site generate a ghost-like image. Or, if there really are ghosts who follow my blogs, then they will all be invisible but they can still Follow.

Like I've mentioned before, no one can contact you by looking through my followers unless you list your blog or website. Anonymous people remain anonymous, even to me. Being a follower does not expose you to spammers, I can't contact you, nor can other followers. And if you do choose to get a Google account, you don't have to use G-Mail or anything else Google (I have a Google account because my previous smartphone required it, but I don't use it any longer, it's just an account I don't use, but it does make it easy for me to subscribe to other blogs that I follow). Nothing bad happens if you follow my blog, I promise. And, since I post once a week and sometimes the stories are about marginally interesting things, you'll simply receive a notification that I posted something, making it convenient for you.

If you are interested in checking out some of my other blogs, here's the partial list:
My columns from magazines I write for: http://jimlongscolumns.blogspot.com/
Bi-weekly newspaper columns: http://ozarksgardening.blogspot.com/
Herb of the Year (Roses 2012): http://herboftheyear.blogspot.com/
My recipes blog: http://jimlongsrecipes.blogspot.com/
My Dream Pillows stories: http://jimsdreampillows.blogspot.com/
I post to those more sporadically, but there are different photos and stories there that you might be interested in. And with even those, you can choose to hit the Follow button, just like this site. 
Even this cornstalk horse follows this blog!
Thanks for stopping by. I'll try to write about something fun in the next post.

9/26/2011

Making Herb Jelly

Herb jellies can be made from any combination of your favorite herbs.

At the end of the summer season most people who grow herbs have lots of extra herbs. There are all kinds of ways to preserve them for winter. Most herbs dry well. Many, like basil, parsley and cilantro, freeze well (chop up in a food processor with a little bit of cooking oil and freeze in ice cube trays; or, just put sprigs of the herbs in plastic bags, push out the excess air and freeze). But herb jellies are also a great way to preserve summer flavors for those cold winter mornings ahead. Here's a basic jelly recipe that can be used for most any herb.

Basic Herb Jelly recipe

2 cups of your favorite fresh herb leaves or flowers (if using dry herbs, use 1 cup)
2 cups water, apple juice or white wine
1/4 cup fresh lemon juice or white wine vinegar
4 cups sugar (white or brown)
3 ounces liquid fruit pectin
pinch of salt
1-2 drops food color, optional

Wash half-pint jelly jars in the dishwasher, or sterilize in boiling water. Keep jars hot until ready to fill with jelly. Use new Ball or Kerr canning lids, and keep them in hot water.

Method:
Coarsely chop your chosen herbs and put in a medium saucepan. Add 2 cups of water or juice and bring to a constant boil for about 10 seconds. Remove from heat and let stand until completely cooled. Strain, discarding herbs, so that you have 1 1/2 cups of the liquid.

Pour the herbal infusion (liquid) into a large cooking pot and add lemon juice or vinegar and the sugar. Bring to a hard boil, then add the liquid pectin and continue to boil for exactly one minute. Remove from heat and skim off any foam and discard it.

Pour the hot jelly immediately into hot, half-pint jelly jars, filling them to within 1/2 inch of the top. Wipe the rims of the jars with a damp cloth and screw on the hot lids, just lightly tightening. Tip the covered jars upside down for about a minute to coat the inside and create a seal. Place right side up on a towel and let cool. Label and store in a cool, dark place. Your jelly will keep for 1-2 years.
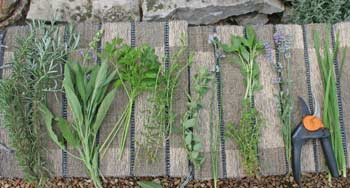
You can use fresh or dried herbs for jelly making. If using dry, use twice as much as when using fresh.

Herbs that work well in the above jelly recipe include: basils, such as cinnamon, Thai, spicy, etc.; chives, chamomile, beebalm, ginger, lavender, fennel, lemon thyme, lemon verbena, marjoram, mint, parsley, scented geraniums, tarragon and rose. Combine herbs you would use in cooking, such as thyme, rosemary and sage, to use for Thanksgiving. Use orange juice instead of fresh lemon juice with orange thyme or scented geranium. Try white baslamic vinegar with tarragon to use on holiday rolls or breads. Use dried rose petals and scented geraniums together. Try basil and blackberry juice with a bit of lemon juice for a jelly. The combinations are endless.

Here's a good lavender jelly recipe that's quick and easy. If you make thumbprint cookies, use lavender jelly in the middle for a surprising burst of flavor.

Lavender Jelly
Use this between layers of cake. Spread on toast, use it in frosting mix for cupcakes. Try a teaspoon or two in your afternoon tea.

4 tablespoons dried lavender flowers
4 tablespoons powdered pectin
3 cups apple juice
2 tablespoons fresh lemon juice
3 cups brown sugar

Tie up lavender flowers in double thickness of cheesecloth, securing with string.
Combine pectin and apple juice in a saucepan and stir to dissolve the pectin. Bring to a boil stirring constantly. Add lemon juice and sugar, stir, then add the lavender cheesecloth bag. Boil for 2 minutes. Remove bag of lavender and discard. Strain hot jelly through cheesecloth into sterilized jars and seal (I use 2-piece jelly lids, kept hot in boiling water but some people prefer the old method of sealing with paraffin).

Cinnamon Basil makes an excellent jelly for all sorts of winter uses.
 Lemon Verbena Jelly

3 cups apple juice
1 cup fresh lemon verbena leaves
2 tablespoons fresh lemon juice or white wine vinegar
1 package powdered pectin
4 cups sugar
1/2 teaspon butter
1 fresh herb leaf for each jar
2 - 3 drops green food coloring (optional)

In saucepan, make herb infusion with juice and herb by bringing juice to a boil and adding the verbena leaves. Boil for about 10 seconds, then let cool completely. Strain and discard leaves. You'll need 1 1/2 cups of herb infusion liquid.

Combine the herb infusion with lemon juice (or vinegar), food coloring and pectin. Bring to a rolling boil. Mix in sugar and bring to a full rolling boil again. Boil hard for one minute. Add butter, stir. If any foam remains, skim off and discard. Pour into hot sterilized jars with optional leaf in each jar. Wipe jar edges with damp cloth, then screw on hot jar lids, tightening moderately but don't over-tighten. Turn jars upside down to seal, for about 30 seconds. Turn upright and let cool on dishtowel. Store in a dark, cool place.

9/20/2011

National Heirloom Exposition

Every imaginable kind of squash, pumpkin and melon.
Mountains of squash and pumpkins in the demonstration hall.
The last time I felt like I was in a large group of like-minded gardeners was at the Terra Madre Slow Foods Conference in Turin, Italy, back in 2005. That is, until the National Heirloom Exposition this past week. The event brought together seed companies, chefs, foodies, serious gardeners, old hippies, new hippies, WWOOFers and anyone interested in locally grown, organic and sustainable foods. Baker Creek Seed, in Mansfield, MO combined efforts with several local and national organizations to put this conference together. Whole Foods, Inc., Seed Savers, Southern Seed Exchange, several organic farming and organic certification organizations. What I kept hearing as people walked around was, "Everyone here gets it! We're all here for the same reasons!"

There was tomato tastings, rare fruit displays, contests, workshops and demonstrations.

Giant pumpkins were on hand for judging. In fact, I can safely say that between the giant pumpkins, the enormous mountains of pumpkins and squash in the display hall, and the children's pumpkin mazes outdoors, there were literally tons and tons of pumpkins at the Expo!
If you can't read it, it says 1051 pounds!
Each of the 3 days had 3 tracts of speakers every hour from 11:30 a.m. to 7:30 p.m. I was nervous about being the first speaker on the very first day, 11:30 a.m. on Tuesday. I expected maybe 20 people to show up, considering people were still finding their way around. I'm honored to report, the room was filled, standing room only! The estimate was 250 people, and oddly enough, many were fans of mine from magazine writing, some even said they had all of my books! But, there were about 70 outstanding speakers in all, with enthusiastic audiences and great exchanges of information.
This chef was demonstrating the Thai art of vegetable and fruit carving.
Click on this photo and look at the incredible carved melons.
Besides buildings filled with heirloom vegetables and fruit, other buildings held rare heirloom breeds of sheep, chickens, cattle and goats. You may recall I'm a big fan of State Fairs. This Expo was bigger and better than our own Missouri State Fair (if you remove the Midway-carnival part). The produce displays and the demonstrations were both way better than any State Fair I have attended anywhere!
There were dozens of kinds of heirloom and rare varieties of corn. Enlarge the photo to see 'Bloody Butcher' the red corn on the right, to see how beautiful it is.
This fellow made this bread and pizza oven the first day and it was ready to fire on the third day.
There were ongoing demonstrations every hour. The fellow above made this oven the first day of the Expo, out of a mixture of ground corncobs, concrete and straw. He put the finish on it on the second day and by day three, it was ready for a fire inside to cook a pizza. Demonstrations on soapmaking, weaving, seed saving, and many, many more happened on the hour.
There were lots of activities for kids and the oven guy helped kids of all ages mix the concrete mix and make tiny ovens.
There were 3 pumpkin mazes for kids, and lots of activities for kids.
There was bluegrass and local music going on all day, outside and inside, too. A wide variety of food vendors served really good foods. Mushroom-stuffed crepes, pulled pork, grilled local beef burgers, veggie sandwiches, grilled heirloom tomatoes with local cheese, organic ice cream, the list is much longer but that's all I can remember. Fair goers ate well!
Produce vendors sold local vegetables and fruits, too.
The setting for the Expo was beautiful and surrounded by trees and picnic tables for relaxing and eating meals.
These mushroom kits grow on used coffee grounds!
Inside the vendor building where we were, there was a wide variety of really interesting products. The folks, above, sell a mushroom kit that's so simple to use, we had to have one. The box is filled with ground coffee grounds and mushroom spawn. You simply mist one side of the box with water and the mushrooms grow out the side of the box. When you're done harvesting, begin misting the other side of the box for a second crop of mushrooms!
I was fascinated by the Hudson Valley Seed Co. packets. Every year they hold an art contest and the winners have their artwork on the seed packet that year. They're collectible and inexpensive. What a good idea!
This is the artist who created the paintings for the Heirloom Gardener 2012 calendar.
I liked this vegetable lady, all assembled out of colorful veggies.
It was a successful and interesting trip to Santa Rosa. I'm hoping the group that organized this will do it again next year. I'm just guessing, but I think there must have been about 24,000 people spread over the 3 days. Sure, standing on concrete at our booth with Herbal Nail Soak and my books for 12 hours a day, then driving an hour to get to bed, left me worn to a frazzle. But it was an exceptional event that brought together a lot of people who are interested in the enormous whole foods, organic and local foods movement. There were displays, speakers and vendors from all across the United States, this definitely was not a local event! And it also brought together lots of our Garden Writing Assoc. friends (Felder Rushing, Brent Heath, Kelly Norris and several more). This was my last speaking gig for the year, and a good way to end the speaking tours. I've been on the road between 1 and 3 weeks out of every month for out of state speaking since March and I'm ready to get to be home for awhile.